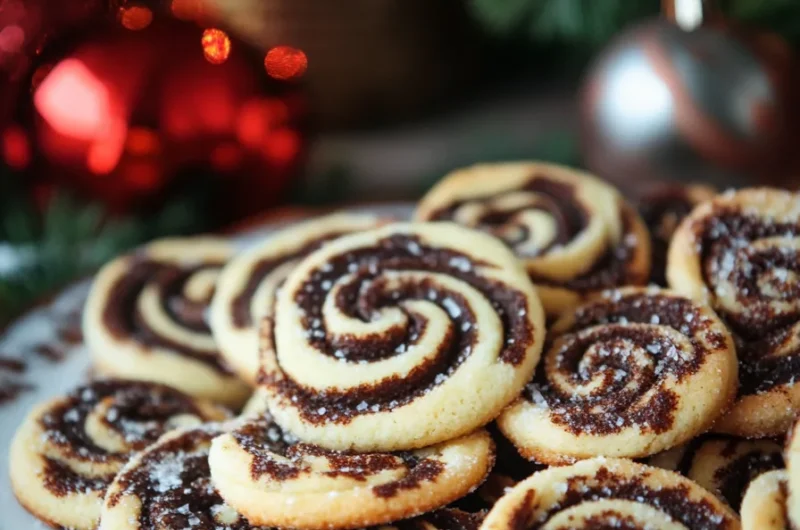
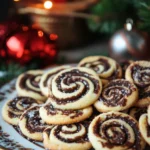
Christmas Pinwheel Cookies will undoubtedly bring joy to your festive season. These vibrant and delicious cookies are a delightful treat that combines rich flavors and a stunning presentation. The swirling colors of red and green dough, reminiscent of candy canes, make these cookies not just tasty but also visually striking. Whether you’re baking for a holiday party, gifting homemade treats, or creating new family traditions, Christmas Pinwheel Cookies are the perfect addition to any holiday celebration.
Imagine biting into a soft, buttery cookie with a wonderful mixture of flavors, and that beautiful swirl catching everyone’s eye. Christmas Pinwheel Cookies are more than a delicious dessert; they’re a festive experience that can hold memories of shared laughter and joy among family and friends. In this article, you will find everything you need to know: why this recipe is amazing, how to prepare it, a detailed list of ingredients, step-by-step instructions, and tips on how to serve these delightful cookies.
Let’s dive into the festive world of Christmas Pinwheel Cookies and discover why they are a must-make for the holiday season.
Why You’ll Love This Recipe
Christmas Pinwheel Cookies are loved for various reasons, making them a favorite among bakers and sweet tooth enthusiasts alike. Here’s why this recipe stands out:
1. Visual Appeal: The colorful swirls make them a showstopper on any dessert table.
2. Versatile Flavors: You can add different extracts or spices for a unique twist.
3. Perfect for Gifting: They make a beautiful and thoughtful homemade gift for friends and family.
4. Family Fun: Baking these cookies can be a fun activity for the whole family to enjoy together.
5. Easy-Freezing: You can prepare and freeze them in advance, making holiday baking a breeze.
6. Quick-to-Make: This recipe is straightforward, making it ideal for bakers of any skill level.
With so many wonderful reasons to love Christmas Pinwheel Cookies, it’s hard to resist making them as a holiday tradition!
Preparation and Cooking Time
Creating Christmas Pinwheel Cookies is not only enjoyable but also reasonably quick. Here’s the estimated time you’ll spend:
– Preparation Time: 30 minutes
– Chill Time: 1 hour (to firm up the dough)
– Cooking Time: 10-12 minutes
– Total Time: Approximately 1 hour and 42 minutes
These times may vary depending on your kitchen setup, but this timeframe gives a good estimate to get your festive cookie baking underway.
Ingredients
– 2 ¾ cups all-purpose flour
– 1 teaspoon baking powder
– ½ teaspoon salt
– 1 cup unsalted butter, softened
– 1 cup granulated sugar
– 1 large egg
– 2 teaspoons vanilla extract
– 1 teaspoon almond extract
– Red and green food coloring
– ½ cup powdered sugar, for dusting (optional)
Step-by-Step Instructions
Follow these simple steps to create your own Christmas Pinwheel Cookies:
1. Prepare Baking Sheets: Preheat your oven to 350°F (175°C) and line two baking sheets with parchment paper.
2. Mix Dry Ingredients: In a medium bowl, whisk together the flour, baking powder, and salt. Set aside.
3. Cream Butter and Sugar: In a large bowl, beat the softened butter and granulated sugar together until light and fluffy.
4. Add Egg and Extracts: Mix in the egg, vanilla extract, and almond extract until well combined.
5. Combine Mixtures: Gradually add the dry mixture to the wet mixture, mixing until a dough forms.
6. Divide the Dough: Divide the dough into two halves. Place one half in another bowl.
7. Color the Dough: Add red food coloring to one half and green food coloring to the other, mixing until you achieve desired colors.
8. Chill the Dough: Wrap each colored dough in cling film and refrigerate for 1 hour to firm up.
9. Roll the Dough: On a floured surface, roll each colored dough into a rectangle, about ¼ inch thick.
10. Layer the Dough: Carefully place the green dough on top of the red dough, making sure to align edges.
11. Roll the Dough: Starting from one edge, gently roll the dough into a tight log. Wrap in cling film and refrigerate again for 30 minutes.
12. Slice the Cookies: After chilling, unwrap the dough and slice it into ¼-inch thick rounds. Place them on the prepared baking sheets.
13. Bake: Bake in the preheated oven for 10-12 minutes, or until the edges are lightly golden.
14. Cool: Remove from the oven and allow the cookies to cool on the baking sheets for a few minutes before transferring them to a wire rack to cool completely.
15. Dust with Sugar: Once cooled, dust the cookies lightly with powdered sugar if desired for an extra festive touch.
How to Serve
Your beautifully crafted Christmas Pinwheel Cookies deserve a special presentation. Here are some ideas on how to serve them:
1. Cookie Platters: Arrange the cookies on a decorative platter to showcase their vivid colors. Add some holiday decorations for a festive touch.
2. Gift Bags: Place cookies in clear gift bags tied with colorful ribbons for thoughtful holiday gifts. Include a handwritten note for a personal touch.
3. Cookie Exchange: Bring these cookies to a holiday cookie exchange. Their unique appearance and taste will surely impress fellow bakers!
4. Pair with Beverages: Serve with hot cocoa, coffee, or milk to create a delightful pairing. The sweet flavors of the cookies complement these drinks perfectly.
5. Decorative Stands: Use multi-tiered cake stands to display your cookies, making them easy for guests to reach and enjoy.
6. Themed Decorations: Consider using holiday-themed décor such as ornaments, lights, or evergreen branches to enhance the festive atmosphere when serving.
By serving Christmas Pinwheel Cookies with thoughtfulness and creativity, you’ll create memorable moments for your family and friends during this joyous season.
Additional Tips
– Use Room Temperature Ingredients: Let your butter and eggs warm up before mixing. This will create a smoother dough and a better texture for your cookies.
– Experiment with Flavors: While the classic Christmas Pinwheel Cookies are delightful, consider adding flavors like peppermint or cinnamon to the dough for a festive twist.
– Roll Evenly: Ensure your dough is rolled out evenly to create uniform cookies. This will help them bake evenly and look great when served.
Recipe Variation
Feel free to customize your Christmas Pinwheel Cookies with these fun variations:
1. Different Colors: Instead of just red and green, incorporate other festive colors. Try blue or gold for a unique visual flair.
2. Add Sprinkles: Sprinkle some holiday-themed decorations on the cookies before baking for added color and texture.
3. Nutty Addition: Add ½ cup of finely chopped nuts, such as walnuts or pecans, to one of the doughs for an added crunch.
4. Chocolate Swirls: Incorporate cocoa powder into one of the halves of dough to create chocolate swirls along with the colored dough.
Freezing and Storage
– Storage: Store your baked Christmas Pinwheel Cookies in an airtight container at room temperature. They will stay fresh for about 5 days.
– Freezing: Unbaked and sliced dough logs can be frozen for up to 3 months. Wrap tightly in cling film and aluminum foil to protect them. When ready to bake, simply slice from frozen and add a couple of extra minutes to the baking time.
Special Equipment
To make your Christmas Pinwheel Cookies, you will need a few essential tools:
– Rolling Pin: For rolling out the colored dough.
– Parchment Paper: To line your baking sheets and prevent sticking.
– Electric Mixer: For creaming the butter and sugar quickly.
– Cling Film: To wrap the dough for chilling.
– Serrated Knife: To make clean slices of the dough log.
Frequently Asked Questions
What if my dough is too sticky?
If your dough feels too sticky, try adding a little bit more flour, a tablespoon at a time, until it becomes manageable.
Can I use colored sprinkles or edible glitter on the cookies?
Definitely! Adding sprinkles or glitter can enhance their festive appearance. Just ensure to add them before baking.
Is there a gluten-free option for these cookies?
Yes! You can substitute all-purpose flour with a gluten-free flour blend, ensuring it has a good binding agent if needed.
How do I ensure the colors stay vibrant after baking?
To help maintain color, don’t overbake your cookies. They should be just lightly golden at the edges when you take them out of the oven.
Can I make these in advance?
Absolutely! You can bake these cookies in advance. Just store them properly, and they will remain tasty for the holidays.
Conclusion
Christmas Pinwheel Cookies are not just treats; they are delightful experiences that bring warmth and joy to the holiday season. Their stunning visual appeal and delicious flavors make them perfect for any festive gathering. By following this recipe and utilizing the additional tips and variations, you can create cookies that will delight your family and friends. Whether you serve them at a party or gift them to loved ones, these cookies are sure to become a cherished tradition for years to come.
Christmas Pinwheel Cookies: An Amazing Ultimate Recipe for the Holidays
- Prep Time: 30 minutes
- Cook Time: 10-12 minutes
- Total Time: 38 minute
Ingredients
– 2 ¾ cups all-purpose flour
– 1 teaspoon baking powder
– ½ teaspoon salt
– 1 cup unsalted butter, softened
– 1 cup granulated sugar
– 1 large egg
– 2 teaspoons vanilla extract
– 1 teaspoon almond extract
– Red and green food coloring
– ½ cup powdered sugar, for dusting (optional)
Instructions
Follow these simple steps to create your own Christmas Pinwheel Cookies:
1. Prepare Baking Sheets: Preheat your oven to 350°F (175°C) and line two baking sheets with parchment paper.
2. Mix Dry Ingredients: In a medium bowl, whisk together the flour, baking powder, and salt. Set aside.
3. Cream Butter and Sugar: In a large bowl, beat the softened butter and granulated sugar together until light and fluffy.
4. Add Egg and Extracts: Mix in the egg, vanilla extract, and almond extract until well combined.
5. Combine Mixtures: Gradually add the dry mixture to the wet mixture, mixing until a dough forms.
6. Divide the Dough: Divide the dough into two halves. Place one half in another bowl.
7. Color the Dough: Add red food coloring to one half and green food coloring to the other, mixing until you achieve desired colors.
8. Chill the Dough: Wrap each colored dough in cling film and refrigerate for 1 hour to firm up.
9. Roll the Dough: On a floured surface, roll each colored dough into a rectangle, about ¼ inch thick.
10. Layer the Dough: Carefully place the green dough on top of the red dough, making sure to align edges.
11. Roll the Dough: Starting from one edge, gently roll the dough into a tight log. Wrap in cling film and refrigerate again for 30 minutes.
12. Slice the Cookies: After chilling, unwrap the dough and slice it into ¼-inch thick rounds. Place them on the prepared baking sheets.
13. Bake: Bake in the preheated oven for 10-12 minutes, or until the edges are lightly golden.
14. Cool: Remove from the oven and allow the cookies to cool on the baking sheets for a few minutes before transferring them to a wire rack to cool completely.
15. Dust with Sugar: Once cooled, dust the cookies lightly with powdered sugar if desired for an extra festive touch.
Nutrition
- Serving Size: 24 cookies
- Calories: 150 kcal
- Fat: 7g
- Protein: 2g